Whistle Proxy
Front-end development environment switching artifact
During the development process, it is often the case that the back-end API is not yet complete or not published to the required environment.
In order not to block the front-end development, we can use whistle to proxy the request.
Installation
首先,我们先安装whistle,可以参考官网教程: https://github.com/avwo/whistle
命令行中输入 w2 start 开启whistle,默认端口为8899
Chrome Extension
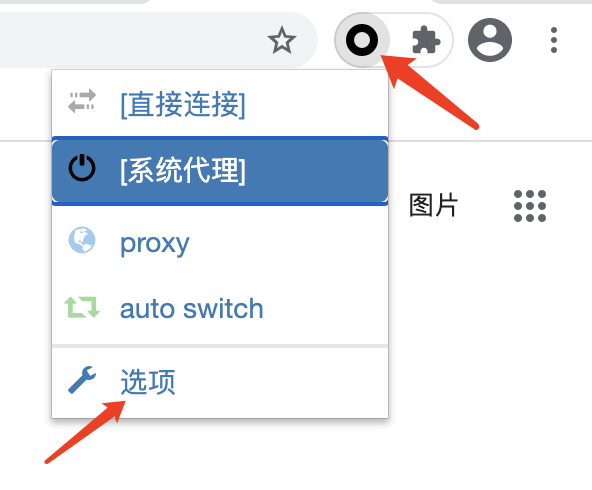
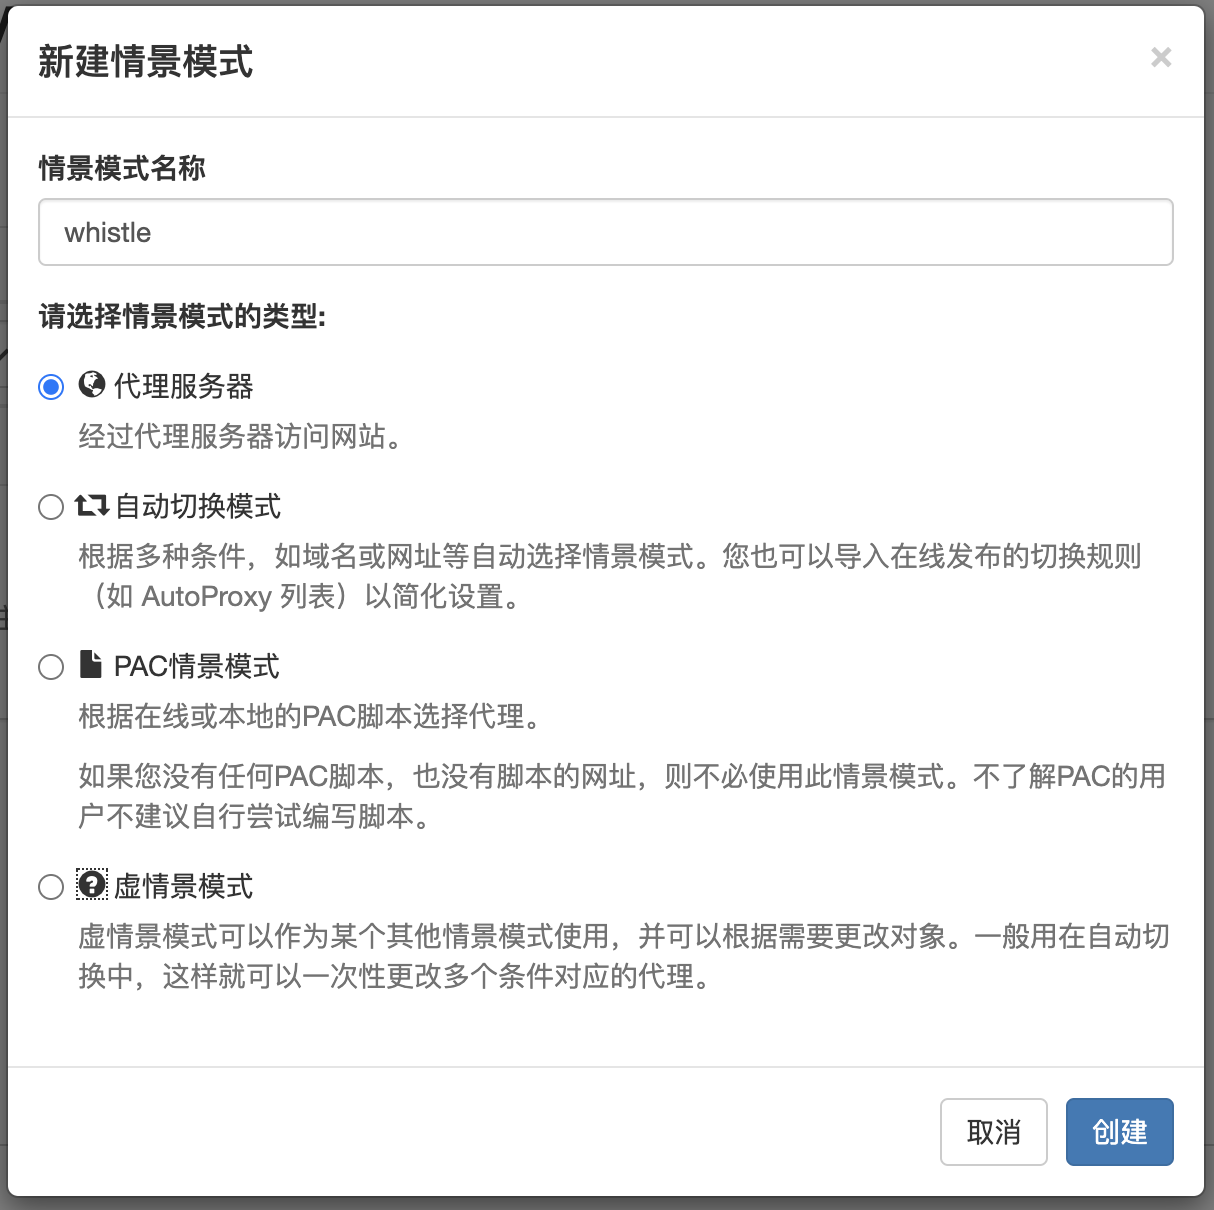
访问:https://chrome.google.com/webstore/category/extensions, 搜索Proxy SwitchyOmega,将插件添加至Chrome中,添加一个whistle情景模式如图所示:
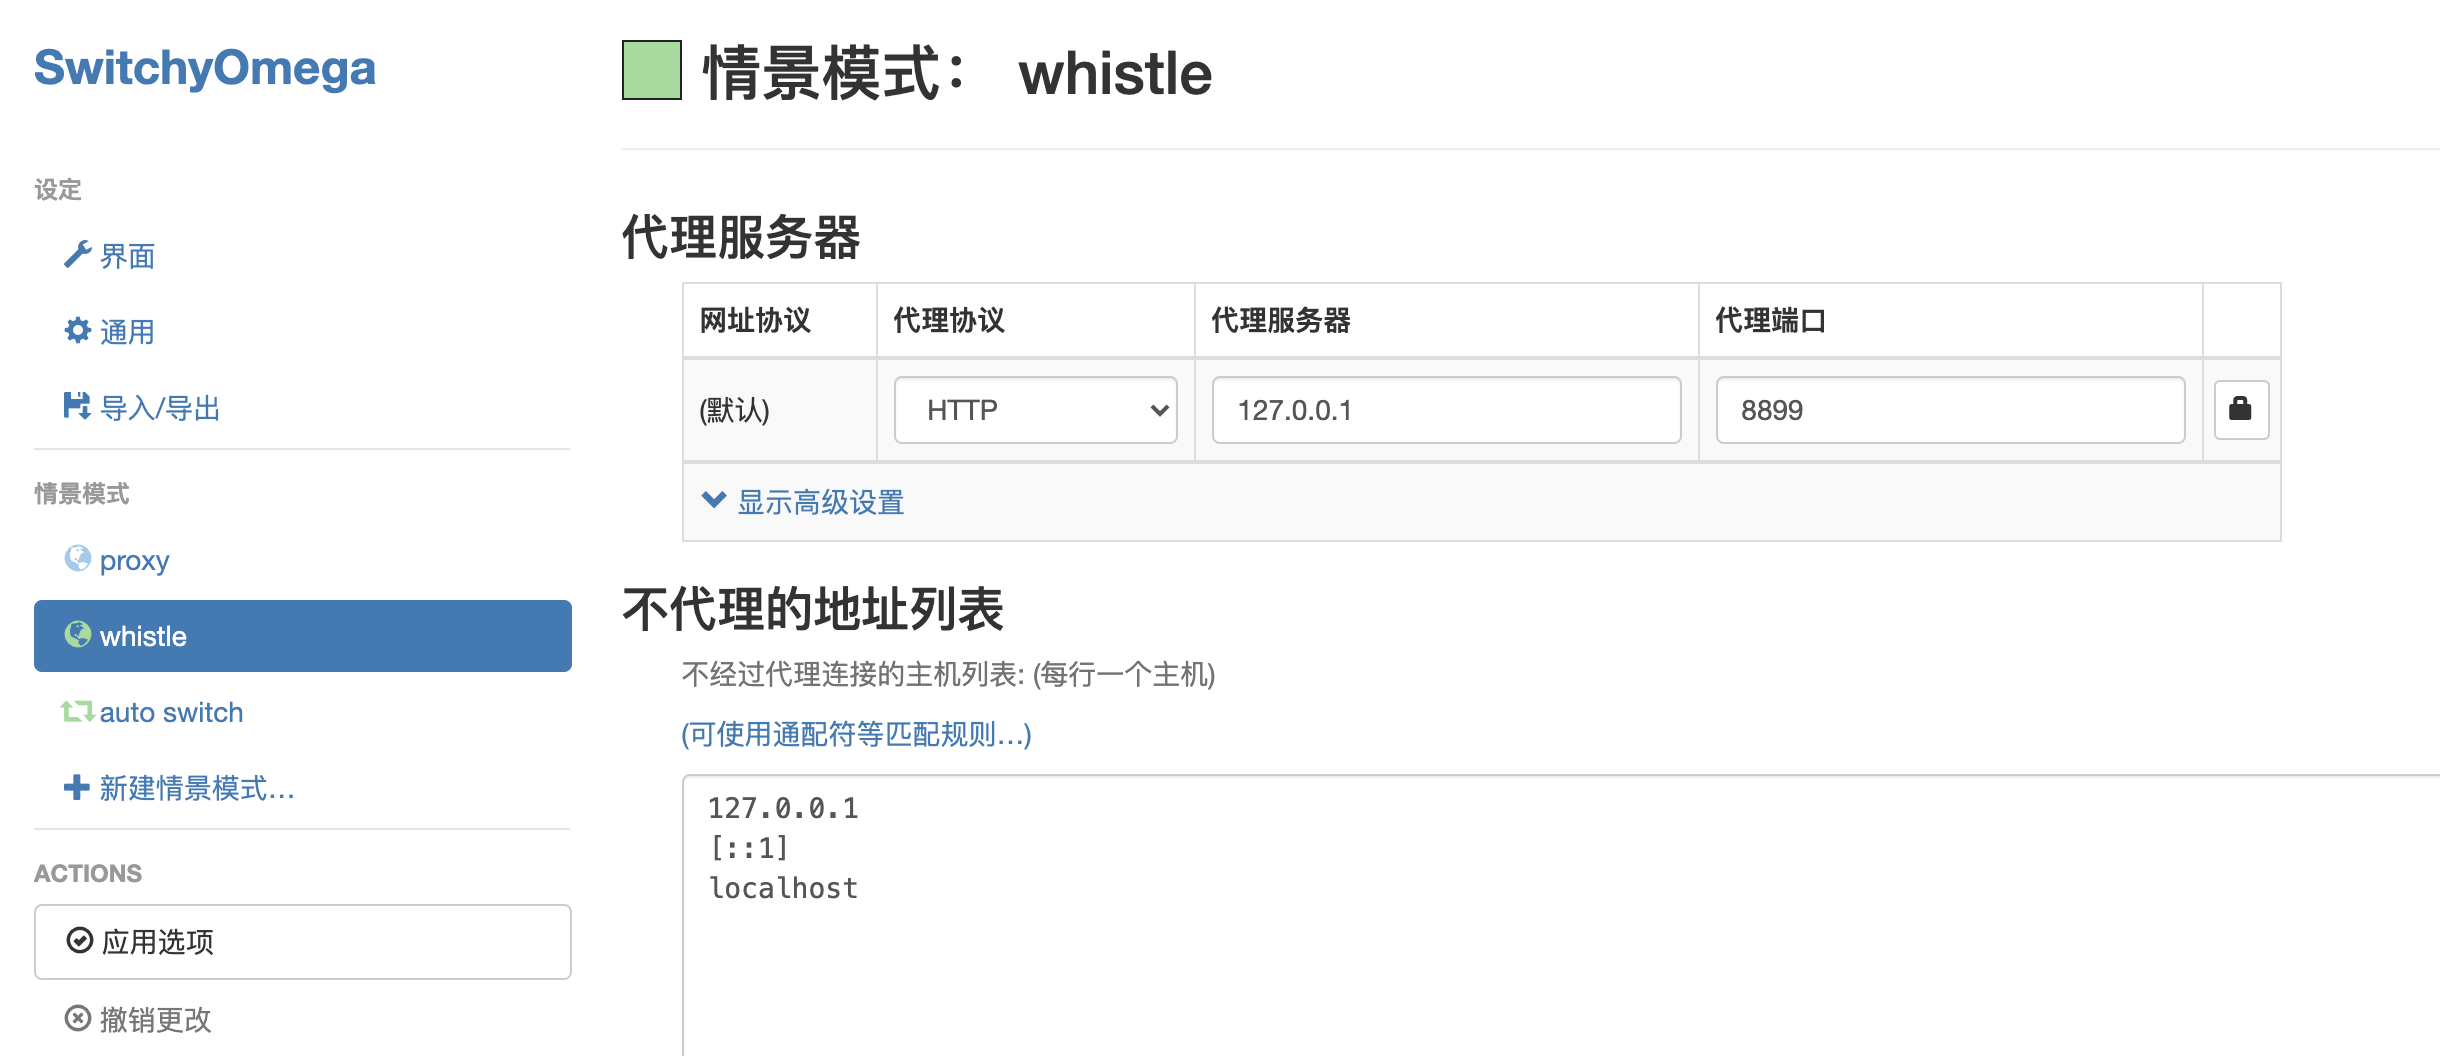
浏览器访问http://127.0.0.1:8899/即可进入配置页面。
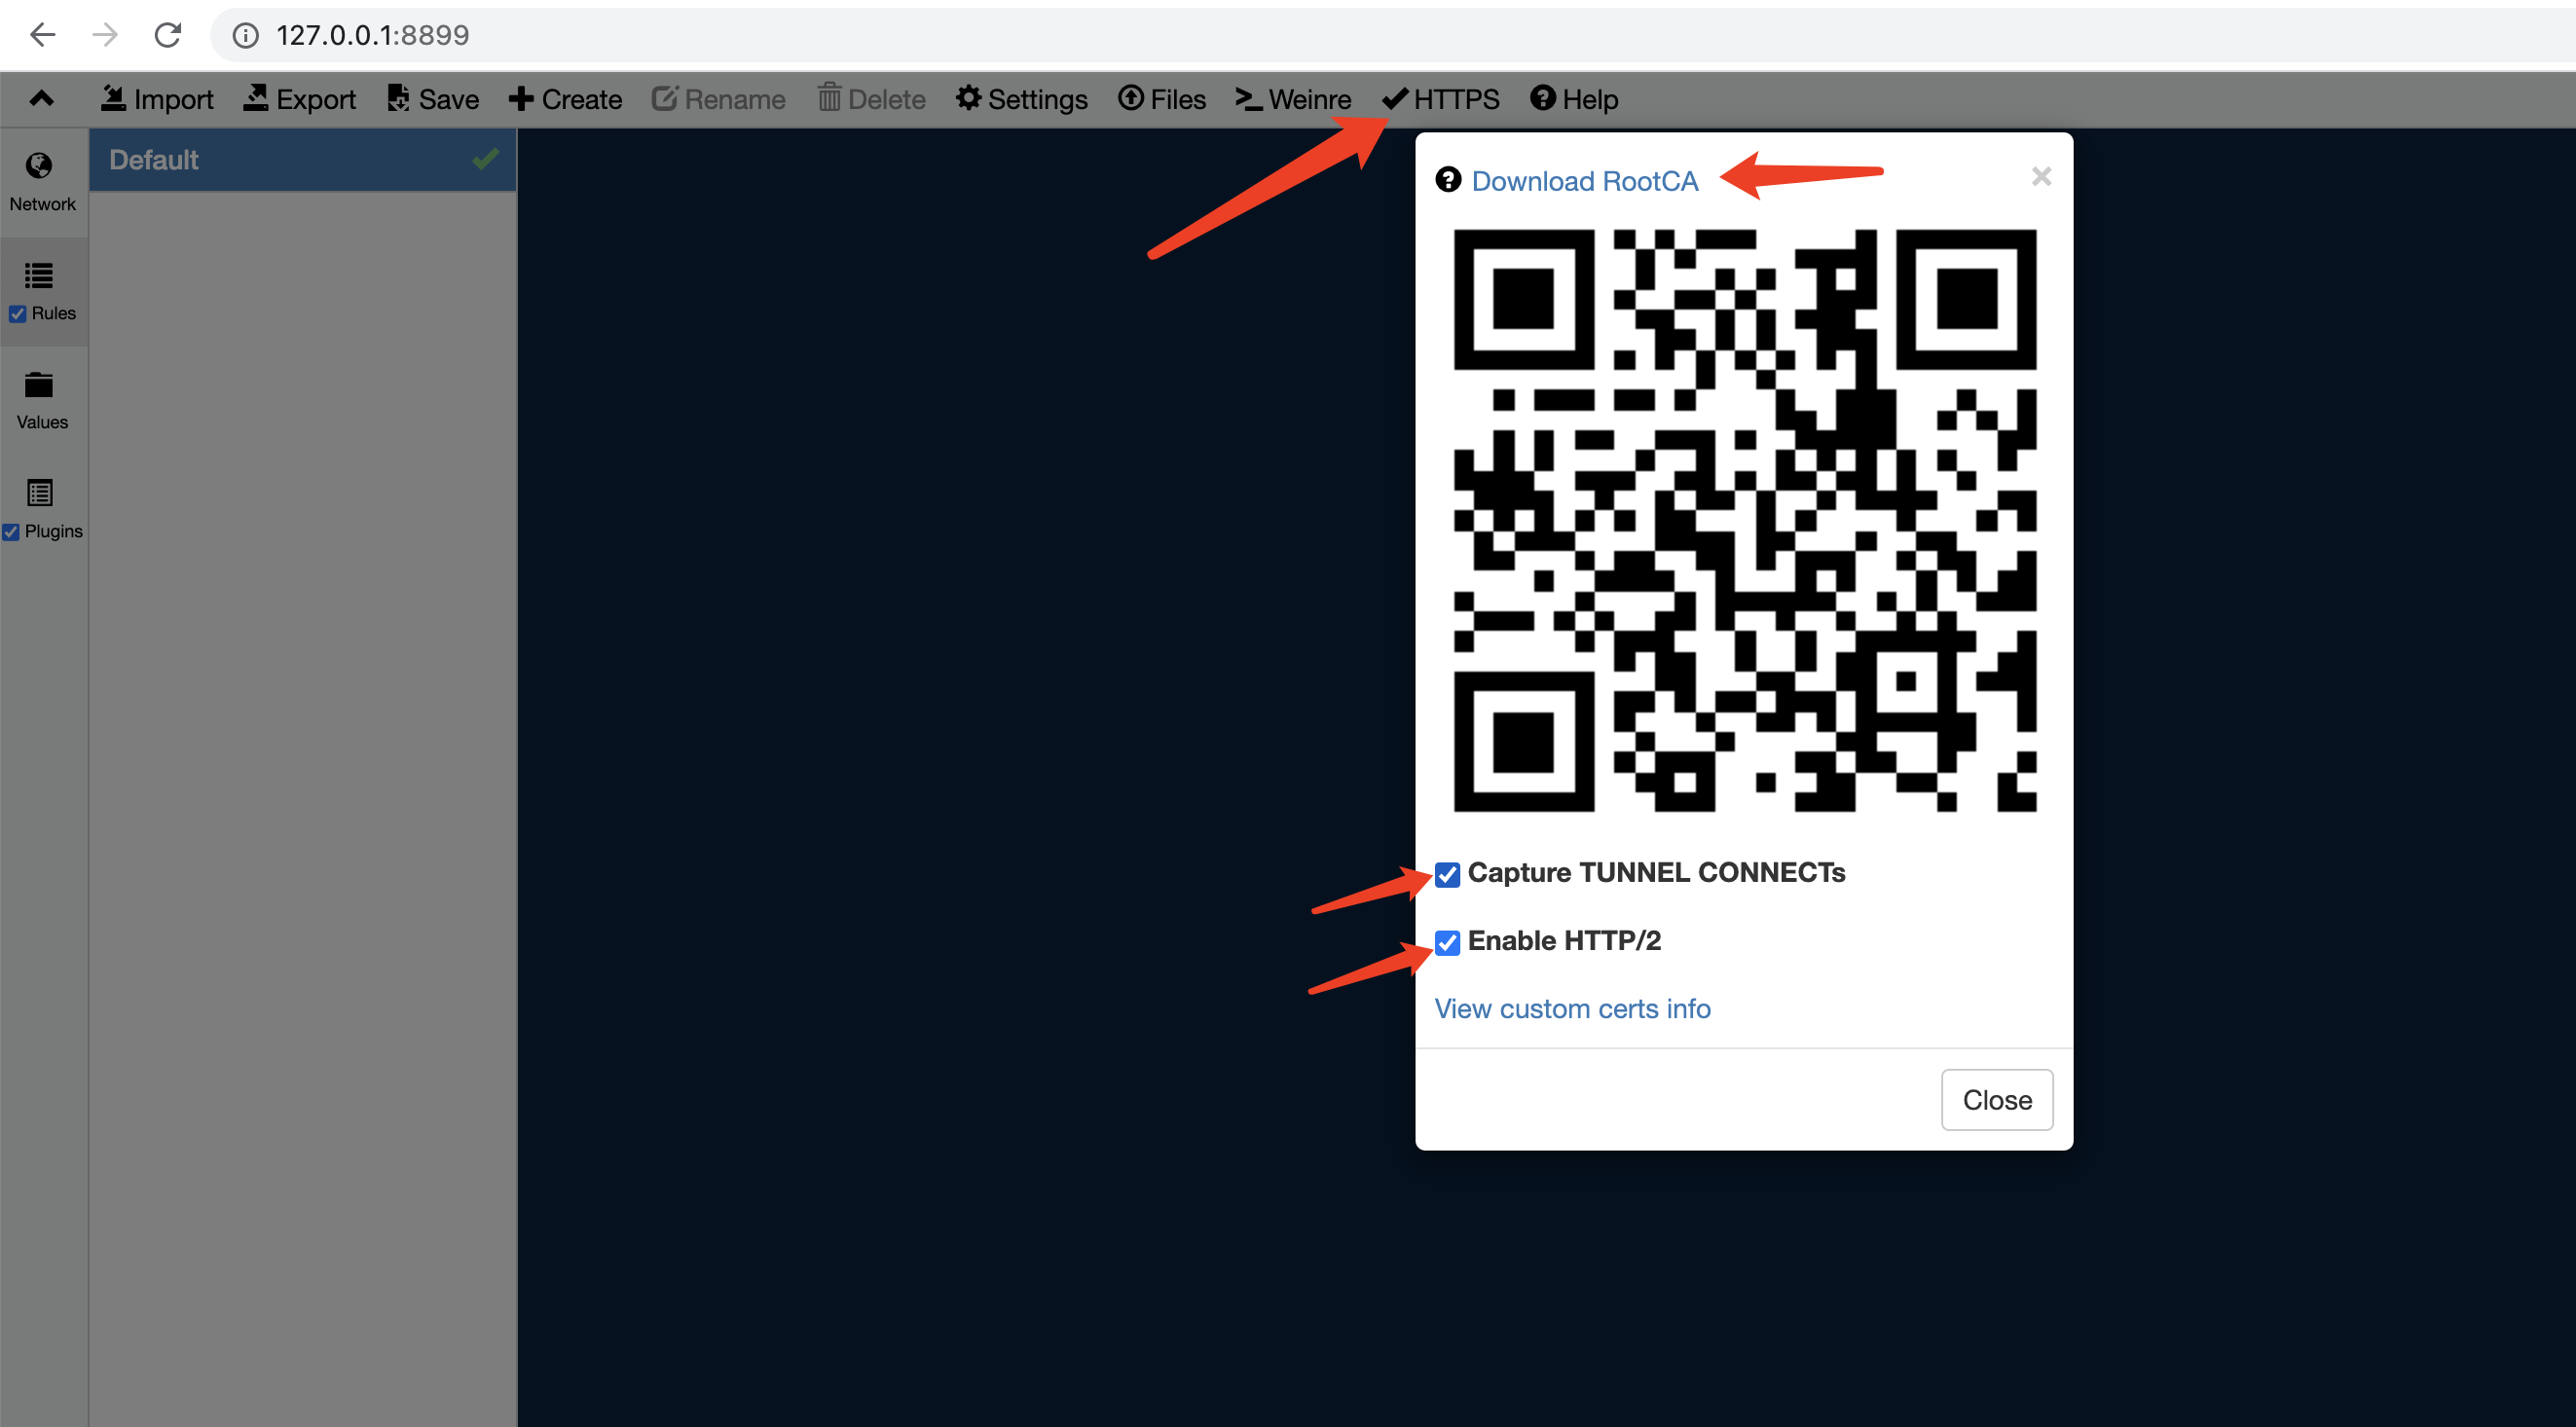
Enable Https proxy
下载根证书并安装它。
Whistle Vase Plugin
然后,我们还需要安装一个插件,名为whistle.vase。
npm install -g whistle.vaseUnix / Linux用户需要加sudo进行安装:
sudo npm install -g whistle.vase在插件一栏能看到vase即安装成功。
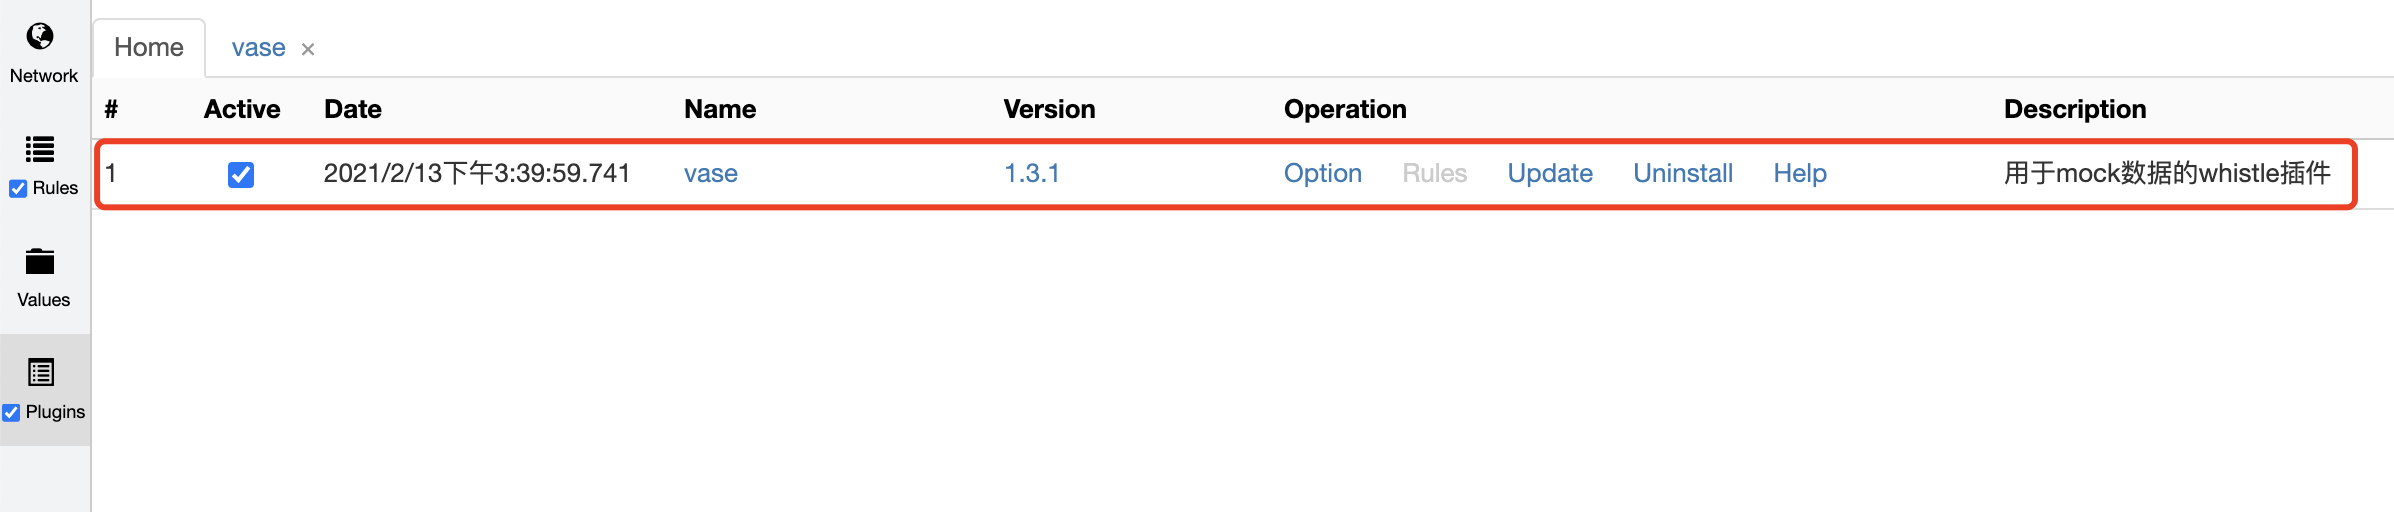
Configuration
可以通过点击Plugins里的vase链接跳转或者直接访问 http://127.0.0.1:8899/whistle.vase/ 进入到vase的配置页。
vase有多种模板引擎,我们这里因为要mock接口数据,所以进行下图的操作:
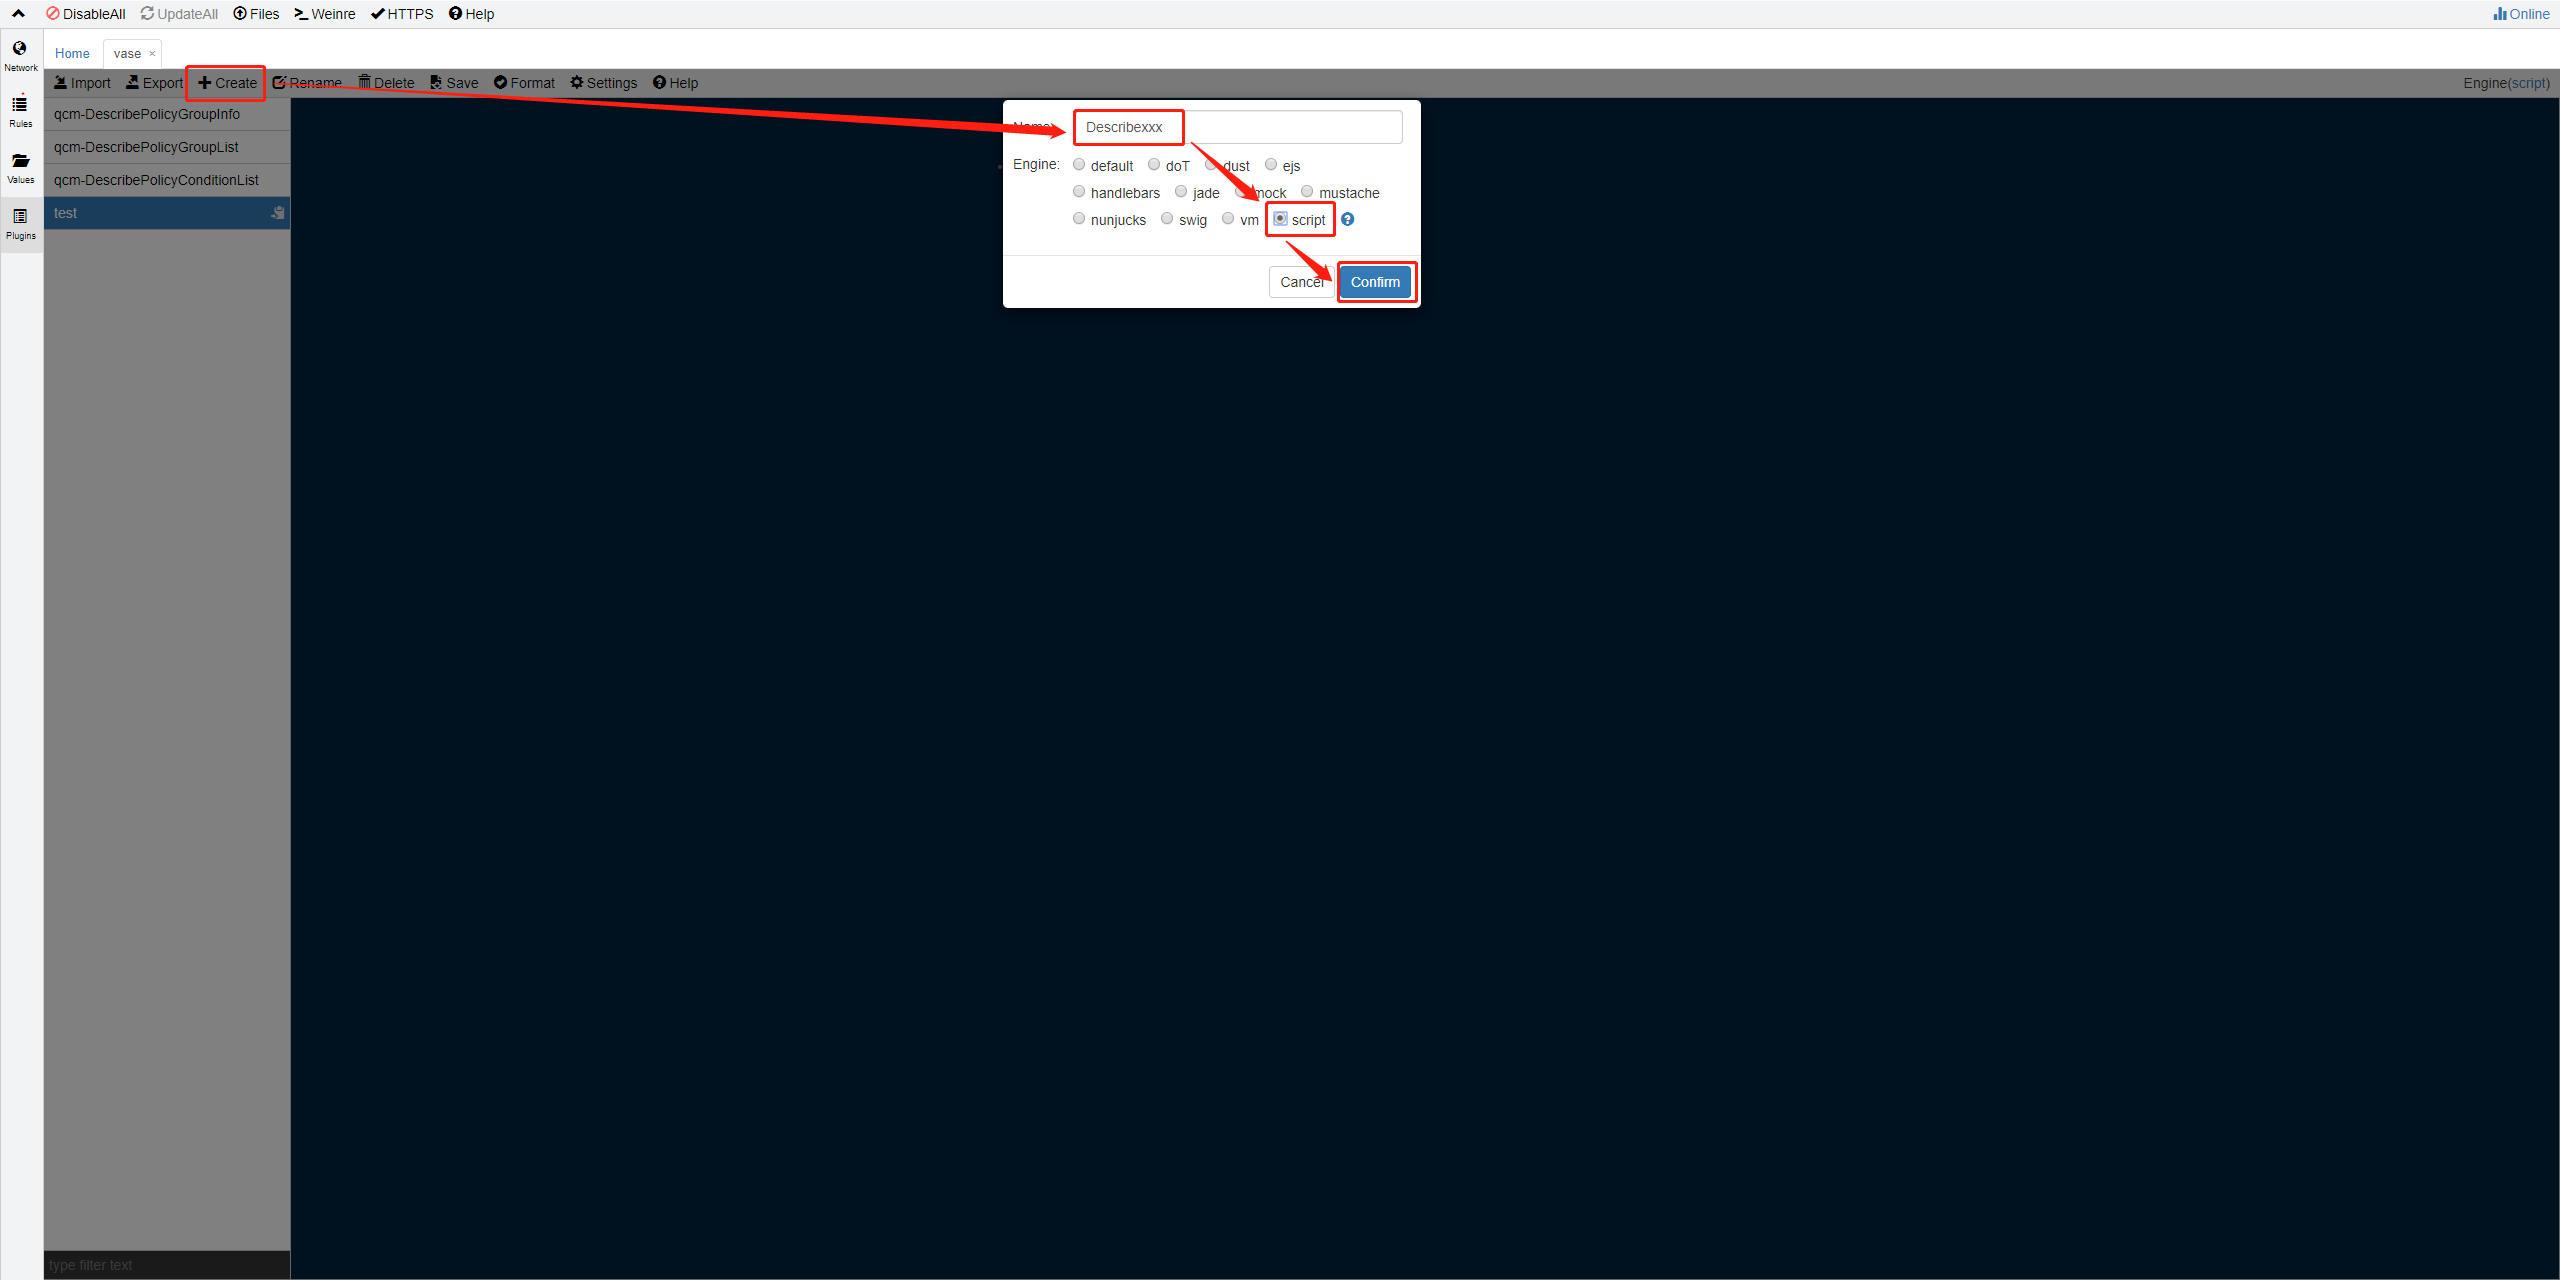
script模板引擎的API如下:
- out: 所有的数据都要通过该方法才能输出到响应中,也可以用 write
- status: 设置输出的http状态码,默认为200,也可以写成 statusCode(code)
- header: 设置响应头
- headers: 批量设置响应头
- file: 读取本地文件
- get: 通过get方式获取线上文件,支持https及http协议
- post: 通过post方式获取线上文件,支持https及http协议
- request: 通过自定义方式获取线上文件,支持https及http协议
- json: 将线上或本地文件、或字符串解析成json对象
- merge: 合并json对象
- random: 随机输出
- join: 合并字符串
- req: 用户请求对象
- render: 渲染模板
更多API详情可以在这里看到:https://github.com/whistle-plugins/whistle.vase#script-api
Mock ReSTful API
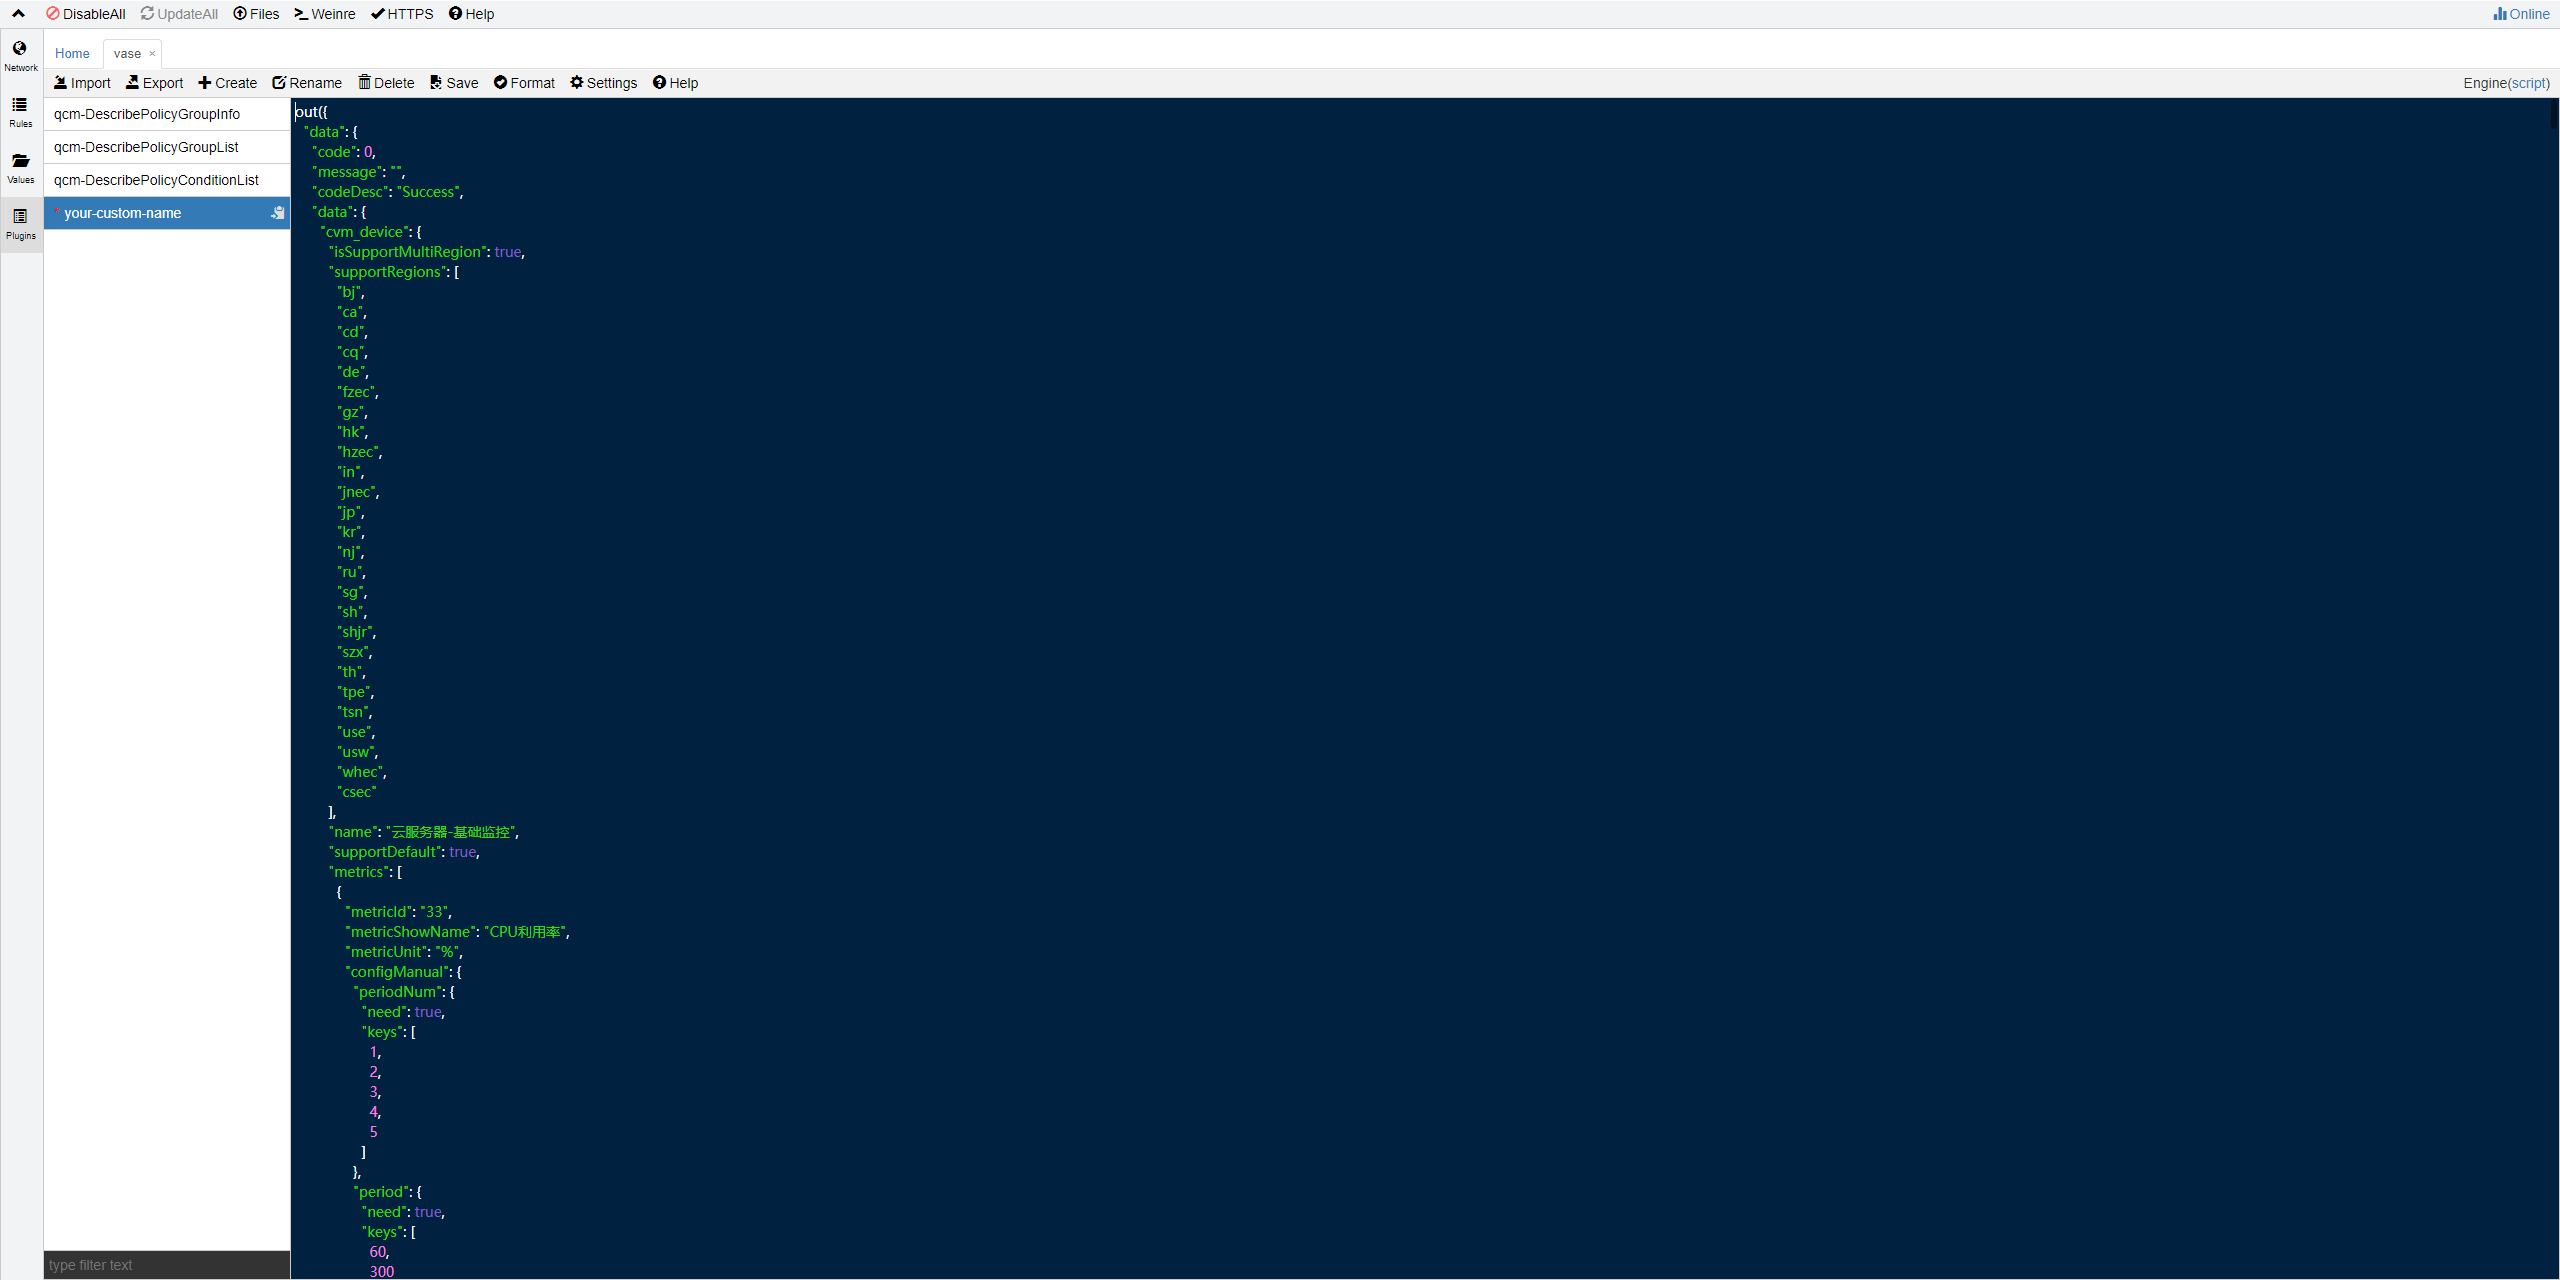
接下来我们可以使用 out(data, delay, speed) 去模拟接口返回的数据:
最后就是在Rules一栏新建一个规则,把 需要mock的接口地址 和刚刚创建的 vase script模板 用空格分开写到一行就可以啦:
https://iaas.cloud.tencent.com/cgi/capi?i=monitor/Describexxx vase://Describexxx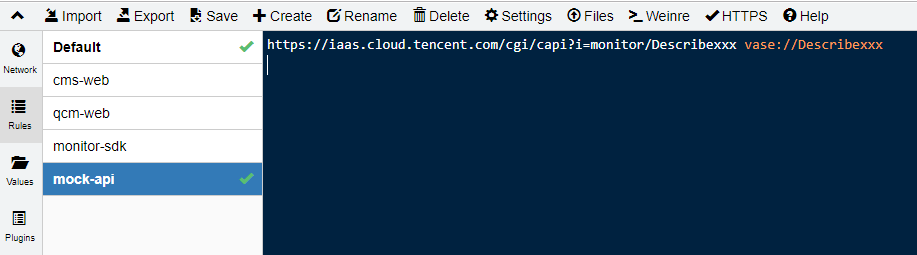
Study Notes · Front End